White subway tiles

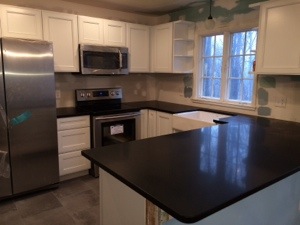
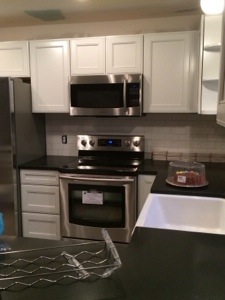
It’s just a start to the finish line but the backsplash is getting started. We stuck with the white subway tile. Partly because I always loved it and also because it is inexpensive. At one point, I was opting for these glass colored subway tiles to reflect off the light and make the space feel larger. But… Dun dun dun. It was like $45 a square foot compared to $3.50. I don’t have money growing from my toes. We went with the white. And I love it!! So clean!

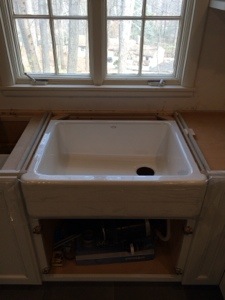
Below is a picture without the grout but with the honed granite! On another note, I’m starting to feel that my sink is doomed. First our sink came banged up to sh*^ and we had to order another. Now… Our white flange came as black. Well the packaging says it’s white. But it’s definitely black. And to add it in… I just noticed that both of the knobs for our faucet say hot!! What the F????

Both products were from Amazon because we are prime members. And Amazon is sending us a replacement flange, but what are the chances?? Now tomorrow I have to call Kingston Brass to figure out this knob thing.

Anyway. Just one more week. Hopefully! I think I gained 5 pounds this weekend eating takeout (we don’t have water in the kitchen until this flange thing is figures out plus other stuff.

So enjoy your home cooked meals tonight!!! I’m jealous.

20140330-195531.jpg

20140330-195550.jpg

Reno reality

The kitchen is almost finished and we are moving in this weekend! We’ve had a few setbacks… Our unbreakable cast iron sink arrived completely damaged. They say they are chip proof but I say otherwise. Okay, we’ll mostly chip proof unless you put a 200 pound “something” on top of it. And our granite still isn’t in and probably won’t get installed until our actual move in day. But otherwise it’s all going swimmingly!!!

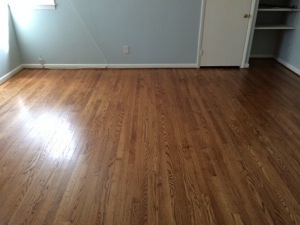
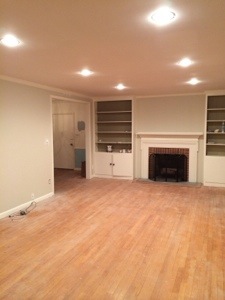
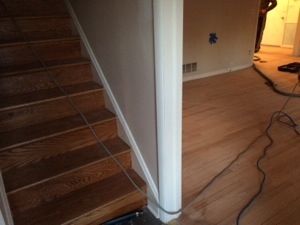
Our recessed lighting in the living room is in and we now have light at night! It’s SO exciting! Our downstairs floors are being refinished as we speak and they are going to be amazing. New amazing. Ahhhhh….. It’s crazy how refinishing floors can completely change the look of a home!

Check it out. Below you’ll see that the steps have been redone but the downstairs floor isn’t. It’s a bit dirty so you can’t really tell but once they fill in the gaps it’s brand new baby!!

This was a quickie mobile post so sorry for the lack of captions.

20140327-165543.jpg

20140327-165633.jpg

20140327-165654.jpg

20140327-165735.jpg

The yellow bathroom

The bathrooms in our new house are very dated.  As in 1960 dated.  As in yellow dated.  I mean YEEEEEEEEEELLOW dated.

Well only the first level is yellow.  I have a pink monster on the second floor.  Haha!  So not kidding.  I guess back in that time when everything was psychedelic, bathrooms were meant to be very monochromatic.  The yellow bathroom is yellow everything.  Yellow tile, yellow backsplash, yellow sink, yellow toilet, yellow tub, yellow walls and yellow fixtures.  You get the picture now??

We aren’t doing too much to the bathrooms other than some minor cosmetic touchups.  Since our main goal is to renovate the kitchen before we move in (done solely by a licensed professional), Mr. P and I decided to tackle our first ever DIY project in the house.  DUN DUN DUNNNNNNNNNN (loud piano music playing)!!!! It was great!  I swear.  He’s handier than I thought and we didn’t even argue!  Odd.  (Side note: I’m super particular and my way is the only way).

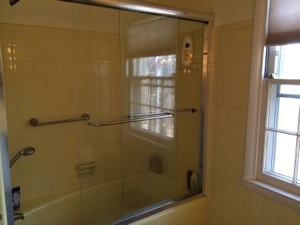
On our first DIY attempt, we wanted to remove these glass sliding doors that were molded into the tub and wall.  This would then break up all the yellow tile and allow us to bring more color to the room.  This seemed like a very straightforward task.  I googled and watched some YouTube videos on what we needed to do.  I also read a great post from Young House Love about their experience removing their sliding doors.  If you haven’t read it yet, you should!  There are some graphic pictures though.

Step 1, we got down and dirty and started to remove the caulk.  It was very easy.  It’s funny because we were so timid at first with our hammer and scrapers.  We didn’t want to damage the walls or anything.  But a few minutes into it we were hammering away!  The two side rails came up quickly but we got a little stuck trying to pull the rail from the actual tub.  Mr. P had one of those claw things trying to pull the sucker. It finally gave way and I was prepared to see the moldy mess that was to sicken me.  But it wasn’t there!!!  We didn’t see any mold, mildew or green grossness at all!  Those builders back then sure knew craftsmanship!

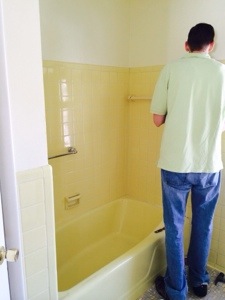
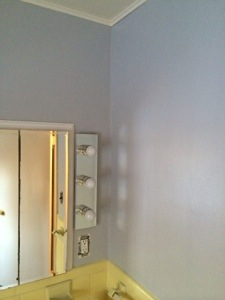
After we cleaned that up we prepped and painted the walls a very light gray color by Valspar in Gravity.  We figured if we have to live with a yellow bathroom for a while, and the fact that all of our guests will use that bathroom, we had to bring it into the 21st century somehow.  Gray is SO in right now, I’m kind of obsessed.  We added two coats of the gray and it looks great so far!  Granted it was night time, but so far we love!

Next up – I’d like to replace the light fixtures above the vanity but I’m kind of terrified that one of us will get electrocuted.  Baby steps???  In the meantime we will repaint the cabinet, replace the vanity mirror, and my dad is going to help us change out the toilets.  There’s no way my bum is sitting on that 50 year old toilet!!  This should be interesting though, Papa bear and Mr. P bonding over a toilet.  As my dad would say, “OH SHIT!”

Below are some photos that we took of our progress.

20140220-094107.jpg
Before
:  This glass mirrored door was very 60s and had to go!

20140220-094212.jpg
After
: We removed the door to modernize the bathroom.  We’ll put a new shower curtain that can breathe life into the room but also to minimize all that yellow!

20140220-094234.jpg
Before
:  Yellow everything!

20140220-094257.jpg
After
:  We painted the walls grey to create a more colorful space.   Don’t the walls almost have a purple hue to them?  I need to see the space in the day time (photo credit: Mr. P)

20140220-094327.jpg
After
:  This is a night photo (with some accidental filtering I left on the camera).  The tiles aren’t that yellow but you can see it changes up the room already with just a little paint.

carnitas tacos

Mr. P and I have a fondness for pigs.  That is we like to eat them.  What’s not to love about a pig?  It is the “other” white meat and pretty awesome at that!  If you eat a chop or tenderloin, it is very low in Weight Watchers points and super lean!  I’m not sure how WW friendly this meal is though…

We eat pork at least once a week so I like to mix it up here and there.  Mr. P’s sister and brother-in-law gifted us half of a pig and lamb for Christmas this year so we’ve got pork coming out of my you know where.  But it is SO delicious!  It’s very fresh due to the animals being grass fed.  Or that they don’t eat that weird feeder stuff.  You may need to Google this one.

I found a pork shoulder in our freezer so decided to attempt making carnitas.  (I’ve actually made this twice now it’s that good.)  In my first try, I placed the shoulder (with bone) into a slow cooker and covered it with water and some vinegar, along with a quartered onion, garlic cloves, cumin, bay leaves, salt and pepper for several hours on low.  Once it was done I just shredded it with a fork and served it up.  This was good, but it still didn’t have that pork taco taste that one usually gets at a Mexican joint.

In attempt #2, I wanted to try true carnitas versus plain ol’ pork tacos.  If you don’t have a slow cooker, you can still cook the pork in about an hour!  Just cut up your pork into 1-2 inch cubes and cover the pot with just enough water along with the other ingredients mentioned above.  Bring it to roaring boil and skim off any weird foam that might come to the surface.  You can place it on simmer with the lid partially covered OR stick it in the oven at 325 degrees for about 60-90 minutes.

I preferred finishing it in the oven because I didn’t want to have my gas stove on for so long.  Totally up to you!  Also, based on how small you cut your pork up will determine the cooking time.  The smaller the cubes the faster it cooks.

Once the pork is tender, take pieces of the pork (you may want to do a rough chop if you don’t want them super big) and return it to a pan, cooking until all the liquid is evaporated and it gets a nice crisp brown color on all sides.  You shouldn’t need to add any oils to the pan since there should be some remaining fat on the pork.  And there you have it!  Carnitas.  I served mine with some mango salsa, shredded lettuce, cheese and hot sauce.   So easy!  Tadaaaaaaa!

Pork Carnitas ~ Ingredients:
–  2 pounds boneless pork shoulder, cut into 1 to 2-inch chunks
–  1 large white onion, quartered
–  2 bay leaves
–  5 cloves of garlic, smashed
– 2 tablespoons of ground cumin
–  salt and pepper

Instructions:
1. Preheat the oven to 325 degrees

2. Combine all of the ingredients in a dutch oven and add water to cover.  Bring it to a boil and skim and weird foam that may come to the surface.  Once at a boil, transfer the pot to the oven with the lid on for about 60-90 minutes (when the pork is tender).

3. Break or roughly chop the meat into bite size pieces and add to a hot pan.  Cook until all the liquid is evaporated and the meat has crisped and browned on all sides.  This should only take a few minutes and be sure not to hoard the pan.  No oil should be needed due to the little bit of fat on the meat.

4. Serve on a soft tortilla and top with your favorite toppings!

Mango Salsa ~Ingredients:
– 2 mangos, ripened and cut into ½ inch chunks
– ½ cup of diced red onions
– ½ cup of diced red, yellow, or green bell pepper
– 1 minced jalapeno, adjust to your taste
– ¼ cup or more chopped fresh cilantro leaves
– 1 tablespoon of olive oil
– 1 whole lime, juiced
– salt and pepper to taste

Instructions:
1. Put all the ingredients into a medium sized bowl and combine.  Serve immediately or refrigerate for a few hours.

Mango salsa.  YUM!

photo 1

Carnitas taco

photo 2 (1)

Savory Goodness

photo 3

all grown up.

It is finally official!  After years, maybe eons, of renting we have finally pulled the trigger and bought our first home!!  Hooray!  If Arsenio Hall were here, he would fist pump and say “HOO HOO HOO.”

We’ve lived in the city the past 10 years and love the easy accessibility we have to restaurants, shops, bars, parks, etc.  We walk a ton during the summer and its so easy to take cabs, or UBER, everywhere.  But one thing we knew… we didn’t want to buy in the city.  No disrespect to my city homeowners!!  I love the city!!!  I still plan on hanging out downtown on the weekends.  But the taxes are crazy high and the public school system isn’t up to par (in my opinion).  This and other factors led to the decision of moving out a little further into the “county.”  We now have trees galore, a yard AND parking!!  Parking is key if you’ve ever lived in the city.

So let’s rewind…  The past month had included so many sleepless nights.  I don’t know about you, but when I buy something I get really REALLY excited.   Like can’t sleep, obsessed excited.  I just want to play with my new toy!  At nights I laid tossing and turning thinking about kitchens, paint colors, design layouts, etc.   Next thing you know its 5am and the alarm would be going off in another 3 hours.  Yes, I wake up late for work J

Funny as it may sound, until the day we put an offer in our house I had never watched a lick of HGTV or DIY network.  The day after we put the offer in… I watched it 8 hours straight.  We are trying to DIY a little and save some money.  I need ideas!!!  We’ve quickly become fans of the Property Brothers, Rehab Addict and Matt from Bath Crashers.   The other night I had a dream that the Bath Crasher’s guy Matt decided we were worthy of a redo!  Sadly… just a dream.

I’ve also become a pinning machine.  I hadn’t been on Pinterest in quite some time; it had lost its luster after our wedding.  So once we bought the house, I renewed my love for it.  There are SO many pictures and ideas on there!  Seriously you can find ANYTHING on there.  I’m slightly obsessed; I have the phone app and am on there all day long.

We have tons of ideas and as my dad said… one project at a time.  Even though the inner me wants to do EVERYTHING at once!!  First things first! The kitchen, floors and paint.  Oh and also the bathrooms, shutters, front door and ….  J  I’m just so excited that we have something that is finally ours.  No more renting.  We can do whatever we want and design the house to fit our personalities.

We are SO excited to have a home of our own FINALLY! YAH us!!!

Stay tuned for more home updates.

PS.  Don’t worry, I’m still cooking up a storm but just haven’t posted any recipes recently.  I swear, check my phone and you’ll see tons of food pics.  I hope to post more often but we’ll see.

20140211-192900.jpg

Seabass is my homeboy

I am obsessed with seabass lately! It is super healthy, low in points ( like better than eating salmon!) and soooo Delish! Amaze-balls!!

FYI if you have never heard this term… Amaze-balls is basically way more awesome then amazing. Call me weird.

Mr. P and I were surprised that we were actually able to maintain our weight while on vacation! That never happens. None the less when we returned to the states we knew we had to get back into eating clean and eating veggies again.
Annnnyway… We’ve been eating seabass almost weekly for a while. It ain’t cheap and it may be nearing extinction?? My sister mentioned this a few times way back when so I’m not sure if his is still the case. What I so know is it ain’t cheap at Whole foods!!

So seabass is super yummy if you bake it for about 20-25 minutes at 425 and sprinkle salt, pepper and paprika! So easy. And paprika makes it so Delish!

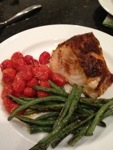
We had this along with some roasted cherry tomatoes and green beans. A very easy and quick meal if you are on the go! A total staple in the Cosgrove household! Seabass is my homeboy and then some… I’d eat it urrry-day!

20131106-222031.jpg

healthy alternatives to a summer barbeque.

This week has been bananas! I meant to post my weekly weigh in but between Monday and Tuesday I managed to work 24 hours, most of it straight, so I was a walking zombie until mid-week. Mr. P made sure each morning I had my smoothie, coffee and lunch packed. He’s so good to me 🙂 I work for The Man in an operations role and very rarely have to pull all-nighters. How do nurses, doctors and whoever else pull such long shifts??!! ACK! I need my sleep.

So very quickly, I couldn’t keep up from last week’s 4th of July festivities and managed to gain 1.2 lbs. last week! Womp wooooooooooomp (sad music in the background). There was no surprise there between eating mouthwatering burgers, drinking yummy white sangria and finishing the week at my dad’s with some savory Chinese goodness. I mean, I pretty much knew I had gained… so why not go all out?! There’s always another week.

Starting Weight: 156 lbs
Current Weight: 141.2 lbs
Last Week: +1.2
Since Start: -14.8

I normally work out every day during lunch since there is a MAC gym in our building but I’ve been at a different office all week and it has thrown me off. I can already tell it may be another + kind of week so I’ve been trying to prepare some lighter meals to make up for not working out.

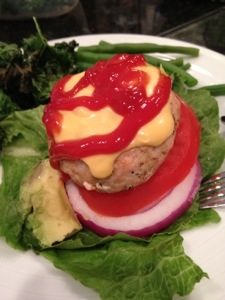
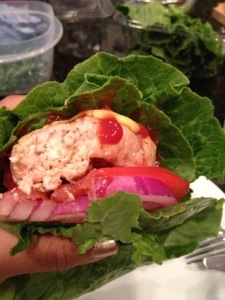
Tonight we decided to take a healthy alternative towards burgers on the grill. This one is a points friendly dinner!!! We made turkey burgers wrapped in lettuce and served it alongside baked kale chips. Can someone say, “YUUUUUUUUUMO?!”

A burger can be so bad for you when you think about the type of beef, buns and toppings… it can add to 10-15 points! ACK! Here’s our healthy twist without sacrificing the flavor. We used lean ground turkey breast in place of the beef, bibb lettuce in place of the bun, and baked kale instead of chips. The meal was super light and… I am able to have some dessert tonight now! Check it out and make your own health twist to cooking out.

PointsPlus: 5 points per serving
Serves: 4

Ingredients for Turkey Burger:
– 1 lb. of ground turkey (as lean as you can find)
– 2 tablespoons of A1 steak sauce (eyeball it)
– 2 tablespoons of Old Bay seasoning
– 1 tablespoon of Pepper
– 4 slices of fat free cheese (KRAFT singles makes a good kind)
– Bibb lettuce (cleaned)
– Slices of red onion (optional)
– Slices of tomato (optional)
– Ketchup and Mustard (optional)

Directions:
1. Heat the grill. Mix the first 4 ingredients in a bowl by hand. Score the meat into 4 sections and make patties with them. Put on the grill and cook on both sides until well done. About 5-7 minutes per side depending on thickness.

2. Add the cheese at the and serve on top of the lettuce, onion and tomato and add another piece of lettuce on top, wrap around and EAT!

Ingredients for Kale Chips:
– Kale (thoroughly washed and dried with a towel or salad spinner)
– Salt
– Nonstick cooking spray

Directions:
1. Preheat an oven to 350 degrees. Line a cookie sheet with parchment paper or foil.

2. Remove the leaves from the thick stems and tear into bite size pieces. Spray kale with nonstick cooking spray and sprinkle with salt.

3. Bake until the edges brown but are not burnt, 10 to 15 minutes.

20130711-214304.jpg

20130711-214316.jpg


a cajun-y rub for pork tenderloin.

Happy early 4th of July folks!! It’s a shame that the 4th is on a Thursday this year (I have to work on Friday)… but hey, I’ll take it to celebrate our nation’s independence! Goooooo America!!!

(As I’m writing this I’m watching South Park and it’s the episode where the baby sees dead people and they have the ghost hunter people come in…) HAHA! I forgot how much I LOVE South Park!

Sorry… off topic.  So our Independence Day comes with the traditional cookout party at our buddy’s parents’ house (the A family) on the water. We’ve been going there for… maybe the past 4-5 years I think??!! The A family are such lovely hosts. Because they live on the water, they are able to catch fresh MARYLAND CRABS! I think the best time, as Mr. A says, is late August to early September. This is when the crabs are the bestest! They are so sweet and delish and he concocts his own mixture of JO spice and other Maryland staples and steams them fresh on the property. I’m hoping we get the invite this year (wink wink)… 🙂

I don’t think we’ll have crabs tomorrow, BUT they also make the most delicious burgers and white peach sangria. Yuuuuuuuuuuuum…. So good, light and refreshing that sangria. I’ll post the recipe one day, upon getting permission from Mrs. A tomorrow.

So I know cookouts are always about hotdogs and hamburgers… but I have a great pork tenderloin rub that is very simple and flavorful. Now I LOVE my red meat… but if you are interested in going for the other white meat, give this a whirl! We eat pork at least once a week because it is so lean.

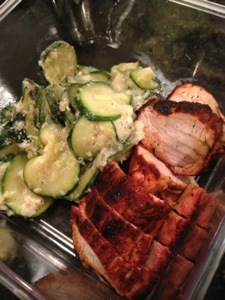
It’s also very low in points; 3 oz. is equal to 3 points! If you have time, marinate the pork in the rub the night before, it literally takes 5 minutes. What I made tonight I marinated for about 30 minutes and it was still good. We had a 2 lb. tenderloin so just doubled the rub recipe. Enjoy the pork with some fresh corn on the cob and a zucchini gratin!

Recipe: Cajun Rubbed Pork Tenderloin
Serves: 4 (or realistically 2-3)
PointsPlus: 3 points per serving

Ingredients:
– 1 tablespoon of paprika
– ½ teaspoon of chili powder
– ½ teaspoon of curry powder (a little more if you like the taste of curry)
– ½ teaspoon of sugar
– ½ teaspoon of salt
– 1 lb. of uncooked lean pork tenderloin

Directions for Cajun Rubbed Pork:
1.) Preheat the grill on high for about 5-10 minutes

2.) In a bowl, combine the paprika, chili, curry, salt and sugar in a bowl. Spread the mixture on a sheet of wax paper. Roll the pork in the mixture until evenly coated. (Marinate the pork in the rub for at least 3o minutes)

3.) Add the pork to the grill and turn every 8 minutes. Ours takes about 20 minutes, give or take. If you don’t cook it often, use an instant-read thermometer and insert to the center of the tenderloin until it registers 160F for medium.

4.) Transfer the pork to a cutting board and let sit for 10 minutes. Slice and serve!

20130703-213938.jpg

almost there.

Yeeeeeeeeeeeeeeeees!!!! I’m almost there. Almost. So close to goal weight. I weighed myself this morning. Guess what?!?!! 140 lbs.!!!! What What?!!!! Yeaaaaaaaaaaaaaaaaaaah! Okay, I’m not really sure how this happened this week so that’s why I’m giving myself the “Arsenio Hall” pumping my fists. Pardon my excitement. And all the exclamation points.

I’m still in shock. Why you ask? How the heck did I lose 1.8 lbs. this week?! Well… if you looked back at my points plus tracker, you would wonder why too. This weekend I ate a… BURRITO. No, not the Taco Bell kind… although from what I recall those are pretty darn good. Might give you diarrhea but still good. I’m not dissing Taco Bell at all. I love the Live Mas campaign, but I don’t think that’s a good points plus option.

So, where did I eat my beef burrito you ask?? In Hampden there is this great place called Holy Frijoles that has great tex mex type food. Whenever we go it’s filled with hipsters, skinny jeans and eyeglasses. It kinda smelled like dank sweat when we arrived. [The day before Mr. P and I had a debate on whether or not “hipsters” use deodorant. He thought maybe it’s too “froo froo” for them. I of course said no, its personal hygiene. Why would someone want to smell bad on purpose???!!] Anyway, we got used to the smell quickly because we were noshing on delicous chips and salsa and savoring a Holy Rita cocktail. What is a holy Rita you ask? Well besides being named after my mother J they are super strong and no frills. My kind of drink. Patron and fresh lime juice. None of that extra mess of sour mix, orange juice, etc. Strong, just like my men. Or I mean man. 🙂 heehee.

Back to the baby-sized burrito, and yes I ate ALL of it. ALLLLLLL of it. It probably did not help that we had gone to happy hour at the Owl Bar and had a few shots thanks to a guy named Chivers. So i cleaned my plate, and what?! My mother always taught me to finish my meals and not to be wasteful when I was a kid.

By Friday my weekly points had diminished and I was only left with activity points to work on after my daily points. It’s nice to unwind after work and on the weekends and have a cocktail or two. Don’t judge!! I still worked out EVERY day, getting in my two spin classes at the MAC, along with lifting and playing tennis 3 times this weekend.

Other than going to the Orioles vs. Yankees game at Camden Yards, this weekend was pretty chill. I was in bed well before midnight on both nights. I’m getting so old now. Oh I also had to go and buy some new work pants because my current ones are too big! YEEEEEEEEES! But its also something I don’t really want to spend money on until I can hit and maintain my goal weight. That said, I ended up going to Marshalls and getting a TON of great stuff for super cheap. Talk about fashionista! They have such great deals and I was able to fit into size 6 pants! I also went to Target and got a new bathing suit and pair of Mossimo work pants. I LOVE their stuff. Their prices are reasonable and well made!

We’ll see how this week goes. It’s been quite some time since I’ve broken below 140 and it is also 4th of July weekend. ACK! I’m just going to continue doing what I do. Workout each day and do my best, that’s all I can do. Hopefully I’ll have something happy to report next week. And if not, I’m not going to be down on myself. Today I’m celebrating something positive and will continue to work this week! Goooooooooo me!!

Starting Weight: 156.0 lbs
Current Weight: 140.0 lbs
Since Start: -16.0

scratch the original, but still made from scratch…

It’s been a loooooong week at work.  Well this week and the last one, and the one before that.  I’ve been holed up in a room with no windows for the past four weeks.  Wait, wait…. I’m not being held against my will.  I’ve just been in a conference room, which happens to have no windows, collaborating on a project for my company.  I actually do have a desk by a window!!  Promise!

Anyway, so every day has been a long one.  Tonight was no different.  Now I LOVE cooking… but it can be exhausting to come home from working 8 hours, going to the gym and then trying to make something savory.  Get it?!  Savory?  Savory Goodness?  Heehee, I’m plugging myself!  Yup.  Okay, back to reality…

So, it can be exhausting because when you get home, or at least when I get home… I just want to have something that is easy to prepare but still delicious.  I still have my go to staple meals like steamed shrimp, grilled chicken or salmon, etc. but sometimes a girl just wants something different!!

Tonight on my way home I stopped at Whole Foods and bought some fresh scallops.  YUM!  I love scallops but Mr. P is a bit weird with them.  He thinks they can get slimy.  He also has a weird phobia in terms of where we get our scallops from (aka. grocery store snob).  I think that he thinks that the seafood guy behind the counter of our local grocery store (which shall remain nameless) is out to get him.  No joke.  He won’t go to the seafood guy anymore at our grocery store because he thinks the guy has a bad attitude.

So, I decided to go to the Whole Foods next to my office.  Did I mention that scallops are a VERY PointsPlus friendly entree?!!  Its only 3 points for 3 ounces, or 6 points for half a pound!!  Originally I was planning on just pan searing them and then serving over some risotto.  Now before you start thinking that I can make my own risotto and you are going to get that recipe… think again.  I haven’t learned how to make risotto from scratch yet.  I’m too in LOVE with boxed kind!!!  Yup, the boxed kind from Lundberg.  We made the Creamy Parmesan Risotto and it was DELICIOUS!!  I’ve never been disappointed and I’m also NOT embarrassed to say this.  I MAKE BOXED RISOTTO!!  It’s still raw and you have to cook it.  But their seasoning is sooooo delish.  If I lost a little of my “street cred,” no worries!  I’m okay with that.

As mentioned, I was just going to salt and pepper the scallops and pan sear them.  Right before I was heating the pan, I decided to take a look at my How to Cook Everything cookbook and found a super EASY recipe and thought to give it a whirl.  I happened to have the ingredients too!  Win win.

This was a different way to prepare scallops.  I did not have paprika (1 tablespoon) so just substituted with a teaspoon of garlic and also added a Serrano chili pepper.  We have a plant in the backyard and love heat. Have a look at this super easy recipe of roasting your scallops!   It was SO yummy, delish and SAVORY but still healthy!   I served the scallops with the risotto and a side of asparagus.  Enjoy!

PointsPlus: 4 points per serving
Serves: 4

Ingredients for the Roasted Sea Scallops

–  1 medium tomato, chopped
–  1 medium onion, chopped
–  1 tablespoon of extra virgin olive oil (or use PAM spray if you want to be healthier)
–  2 tablespoons minced fresh parsley leaves
–  1 teaspoon of minced garlic, 1 or 2 cloves
–  1 Serrano or jalapeno pepper, chopped
–  salt and pepper
–  1 lb of scallops
–  ¼ cup of panko breadcrumbs (optional)

Directions:

1.  Heat the oven to 450 degrees F.  Mix the tomato, onion, parsley, oil, garlic, pepper, salt and pepper together in a baking dish just large enough to hold the scallops in one layer.

2.  Bake until the juices bubble for about 10-15 minutes and remove.  Nestle the scallops into the tomato mixture and sprinkle the top with the panko if you like.  Then take the PAM and give it a few quick sprays.  Return to the oven and roast just until the scallops are opaque about halfway through, about 10 minutes, depending on their size.  Serve spooning some of the pan mixture with it.

prep scallops finished scallops side dishes

oh and if you are still reading… it was COCKTAIL time at the C household tonight!!  Tonight… it was all about gin and lillet.  3 parts gin, 1 part lillet, shaken not stirred with a lemon twist.  SO satisfying after a long day pushing the grind.  Cheers!

cocktails